Overview
Form schedules are events (actions) scheduled based on Date, Date-Time field values present in Forms. The Date, Date-Time field value will be taken as scheduling due date (or as start date and end date) in case of schedules with repeats like 'monthly' or yearly. For example, consider a "Contact Form" with DOB field for each contact. You can schedule a birthday email for all the entries in the contact form by configuring the DOB field as the 'start date' with a repeat configuration of 'yearly' and write the birthday wishes to be sent using Deluge script. Also you have the option to send mail with reports and file uploads as attachments and apply criteria for the data, so that only some records are chosen for scheduling.
Configuring a Form Schedule
To create a Form schedule,
- Select the form for which the Form Schedule must be configured.
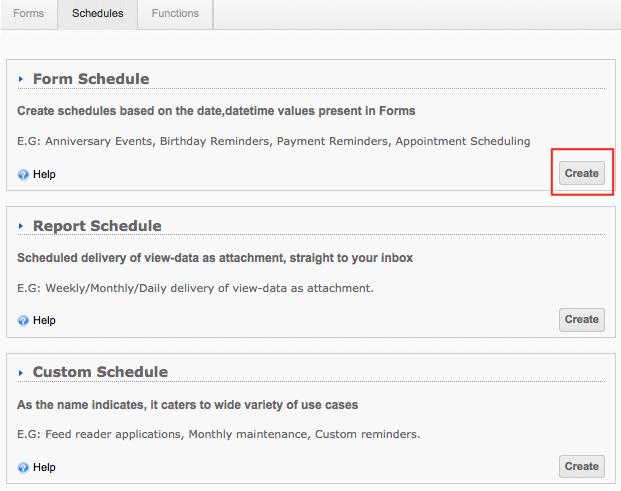
- Click on the Workflow -> Schedule option. If you are defining a schedule for the first time, click on the Create button displayed within the Form Schedule text box, as shown below (or) If you have schedules listed in the Schedule tab, click on New Schedule -> Form Schedule option.
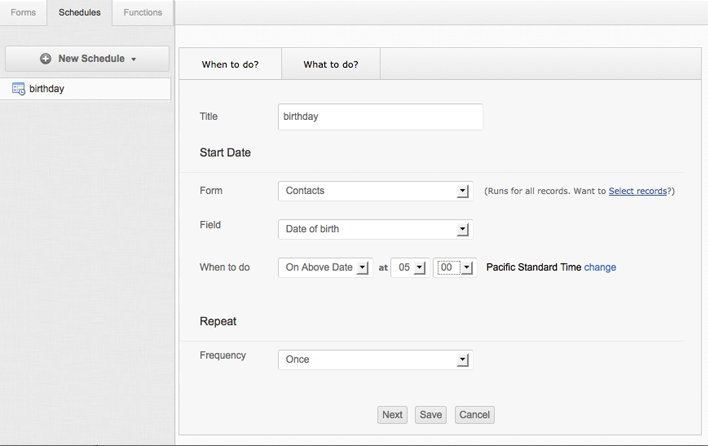
The New Form Schedule screen will be displayed with two tabs - When to do tab and What to do tab. The When to do tab is used to specify the schedule title, date and time of the schedule and its repeat frequency. The What to do is used to configure the schedule event/action. By default, the When to do tab is selected. Define the Event by selecting the When to do tab.
- In the Title text box, specify a meaningful title for the schedule. A schedule will be identified by its title and will be listed under the Schedule tab.
- From the Form list box, select the form whose field value will be specified as the Start date. By default, the schedule will be executed for all the records in this form. If you want to execute the schedule only on selected records, select the Select records link. This will display the Set Criteria dialog to specify the criteria based on which the records will be filtered.
- The Field list box will list all the data and time fields in the selected form in addition to the Added Time and Last modified time fields. Select the required date/time field based on which the event will be scheduled.
- From the When to do list box select when the event has to be scheduled.
- Select "on above date" if the event has to be scheduled exactly on the specified date or date-time. For date fields (not date-time field), you can also specify the Hours and minutes when the event will be executed on that date.
- Select "Before" if the event has to be scheduled before the specified date/time. For date fields, you can specify the number of days/week before the specified date, when the event has to be scheduled and also the Hours and minutes when the event will be executed. For date/time fields, you can specify the number of minutes/hours/days or week before the specified date-time, when the event has to be scheduled.
- Select "After" if the event has to be scheduled after the specified date and time. Here, you can specify the number of minutes/hours/days or week after the specified date, when the event has to be scheduled.
- Repeat frequency is supported only if the start date is a date field (not date-time field) or if 'Ignore Time Component' is checked.
Click Next to define the action for the schedule. This will take you to the What to do screen.
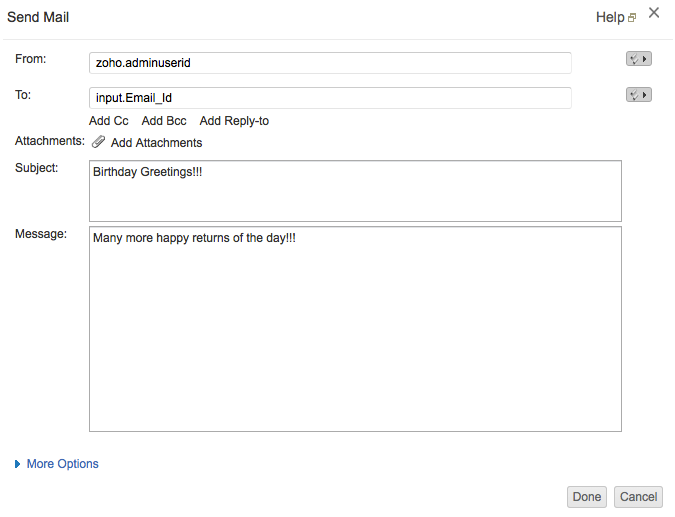
- Selecting the What to do tab will display the Deluge Script Builder to configure the event (action) to be scheduled using Deluge Script. All the tasks supported by Deluge Scripting will be listed on the left-side. For example, let us configure the SendMail action to the "Happy Birthday" schedule we have created above, with the required From, To, Subject and Message content. You can drag-n-drop the tasks or use the free flow scripting option to configure the event. Refer the Developer Guide section to learn more about each task.
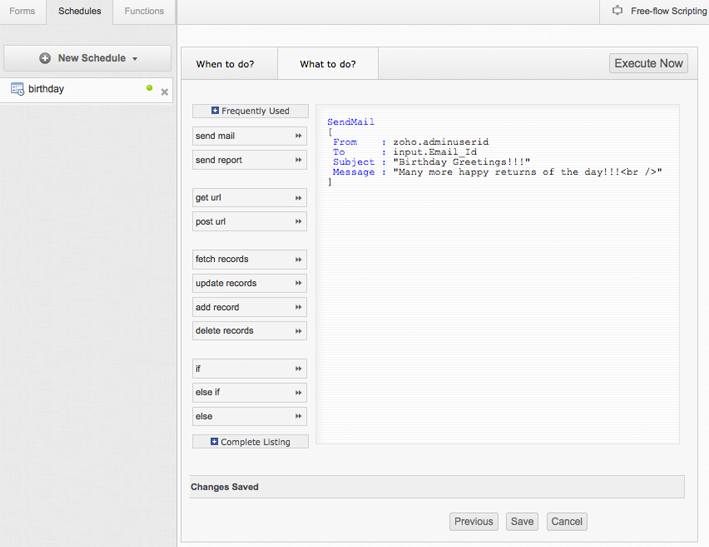
Click Save to save the configurations. The schedules created will be listed on the left-side and the Script definition of the schedule will be displayed on the right-side.
Sending Views, Reports, File uploads and Record Summary as attachments
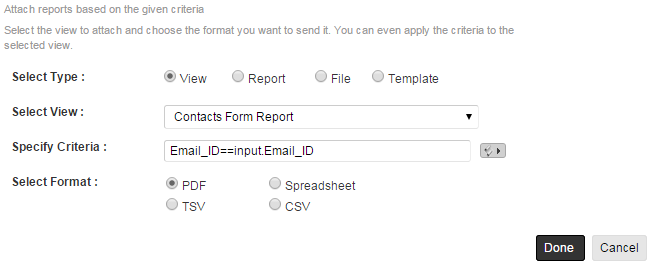
You can configure a form schedule to send a view, report, files uploaded and record summary as attachments from the send mail dialog.
To do this,
- Click on the "Add attachments" link displayed in the Send mail dialog, as shown in the screen-shot given below.
- Select the view, report, file or template to be sent as attachment. Selecting the "File" option will enable you to send the uploaded file as attachment. Selecting "Template" will enable you to send your configured record summary as attachment.
