Sign-up Form
Your subscribers will obviously need a source to sign-up for your emails. To do this you can embed sign-up forms in your website and help your viewers to sign up to your mailing list(s).
Create Sign-up Form
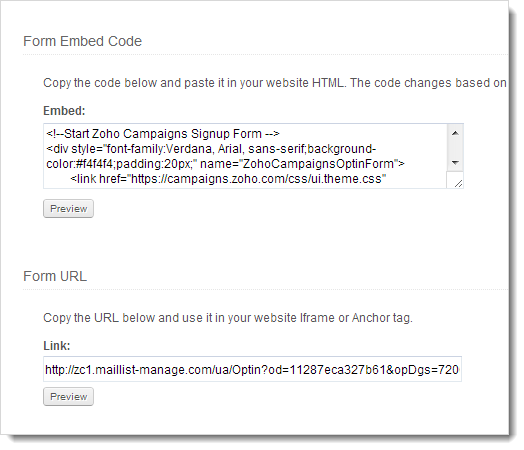
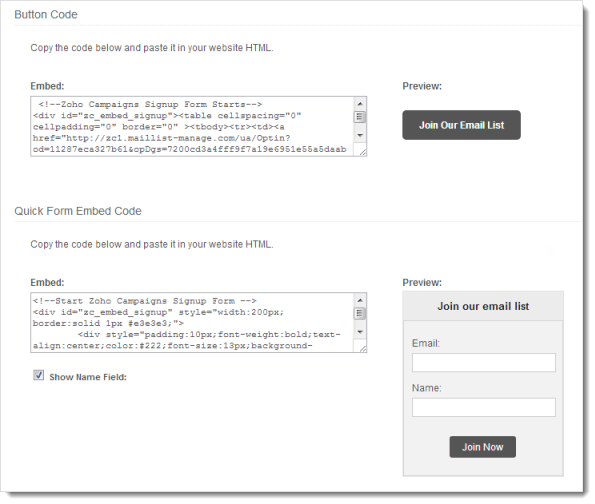
You can create your Sign-up form in 4 simple steps. You can make use of our different ways to customize the sign-up form ranging from themes, edit form fields and select out of different formats such as Form Embed Code, Form URL, Button Code, and Quick Form. Let’s take a drive to create a beautiful sign-up form.
To create sign-up form,
- Go to Contacts tab --> List Management
- Hover the mailing list, you want to create a sign-up form
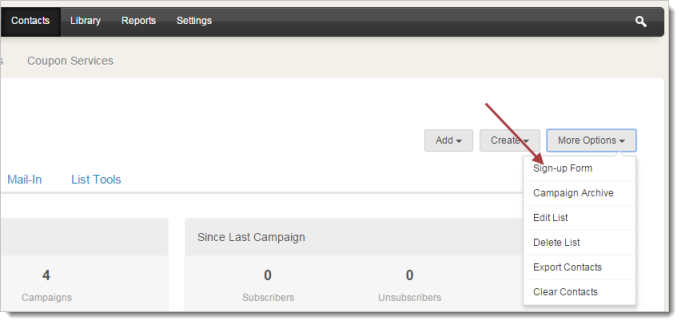
- Click More Actions --> Sign-up Form

Alternately,
You can go with the following steps to create a sign-up form
- Go to Contacts tab -- > List Management
- Click the mailing list, you want to create a sign-up form
- Click More Actions --> Sign-up Form
Note
- If you have selected a mailing list not created by you or a mailing list marked as private (Sign-up form subscription not allowed), then you cannot view Sign-up form under More Options.
Add Theme
Design your Sign-up form by adding a customized Sign-up Form theme using different style and color which compliments your website. Learn more on how to create a Sign-up Form Theme?
To add a sign-up form theme, follow the steps below:
- Go to Contacts module --> List Management subtab.
- Click the Mailing Lists; you’d like to create sign-up form.
- Now, click the Sign-up Form button present at right hand side.
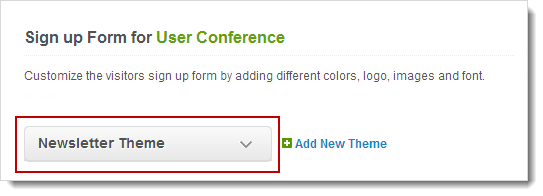
- In Sign-up Form page, select a sign-up form theme from the drop-down menu.
- This will prompt you to change the theme, click Apply Themebutton.

Edit Form Fields/ Sign-up Form Customization
To edit the sign-up form fields, follow the steps below:
- Go to Contacts module --> List Management subtab.
- Click the Mailing Lists; you’d like to create sign-up form.
- Now, click the Sign-up Form button present at right hand side.
- In Sign-up Form page, click the Edit Form Fieldsbutton.
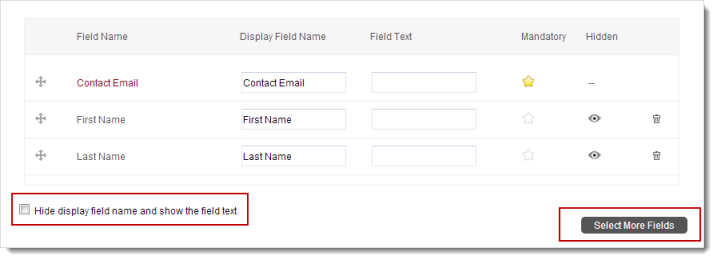
- In Sign-up Form Customizationpage, do the following:
- Click Select More Fields button to add more fields.
- Click the star icon to make the fields mandatory.
- Click the eye icon to hide the fields from subscribers.
- Rearrange your fields by drag and drop option.
- Click the Save & View button to confirm.
Note
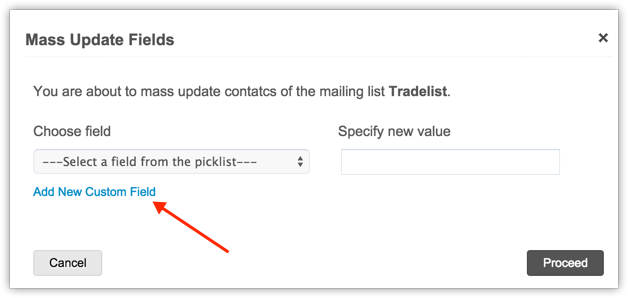
- You can add custom field by clicking the Add Custom Field and adding your display label and length.
- You can select another mailing list to add to this Sign-up form. Once a subscriber completes the Sign-up form, he will be automatically added to this mailing list.
- You can select the checkbox to hide the Display Field Name and show the Field Text.
Preview of Sign-up Form
You can have a preview of your signup form along with applied theme and customized new fields.
To preview the Sign-up form, follow the steps below:
- Go to Contacts module --> List Management subtab.
- Click the Mailing Lists; you’d like to create sign-up form.
- Now, click the Sign-up Form button present at right hand side.
- In Sign-up Form page, click the Edit Form Fields button.
- After making the required changes, click the Preview button to view your Sign-up Form.

Embed Form Code
Your subscribers will obviously need a source to sign up for your emails. To do this you can embed signup forms in your website and help your viewer’s signup to your mailing list(s).
- Go to Contacts module --> List Management subtab.
- In the Mailing lists page, do the following:
- Click the Mailing List for which you want to integrate a Sign-up form on your website.
- Click the Sign-up Form button to view the Sign-up Form Code which can be embedded in your web site.
- Click the Preview button to decide the signup form style.
- Copy and embed the code.
Sign Up Response Configuration
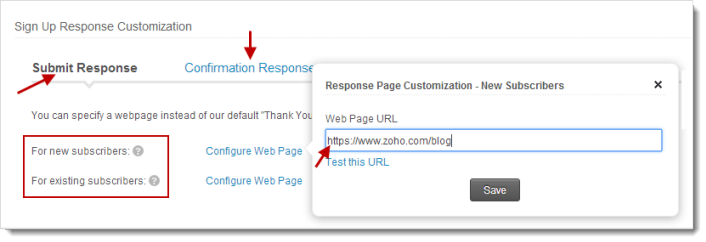
You can make your subscribers to get redirected to another website after a successful signup. All you’ve to do is to add the webpage URL (you want to get redirected) to the path below:
To add the Call Back URL, follow the steps below:
- Go to Contacts module --> List Management subtab.
- Click the Mailing Lists; you’d like to create sign-up form.
- Under Sign up Response Customization, click the Submit Response/Confirmation Response present at the bottom.
- Click the Configure Web Page link to enable the web page URL box.
- Enter the webpage URL, you choose to redirect your subscribers.
- Click the Save button to confirm.
