Overview
An application created in Zoho Creator can either be Public or Private. All Forms and Reports in a public application is accessible by public visitors. A Private application can be accessed only if the owner of the application shares it with specific users. By default, an application created in Zoho Creator is private. The Setting -> Share option displays the layout of the application on the left-side with the forms and reports arranged under each tab. The admin user (application owner) can share the entire application or only specific forms and reports, with anyone who has Internet access and an e-mail id. If the shared user holds an existing Zoho account with login id as the shared e-mail id, he can just Sign in to access the application.If the shared user does not own an existing Zoho account, he has to Sign Up with the e-mail id specified in the invitation e-mail.
Access Permissions
The application owner can control the access permissions of shared users using the Report Settings -> Permissions option. Refer the topic, Access Permissions for more information on configuring the access permissions for users.
When a user adds or modifies a record in his shared application, the name of the user who added/modified the record and the time when it was added/modified will be automatically stored. This information will be displayed in the view, if the following columns are selected from Report Settings -> Column Properties option. Refer the topic Display username and time for more information.
Share Application
Zoho Creator enables the administrator to share the entire application or only specific forms and views, from the Invite Tab. The number of users with whom the application can be shared, depends on the subscription plan.
Share with individual users/groups
- Select the required component from the Components Tree on the left-side of the Share -> Invite page. Refer Levels of Sharing for more information.
- Select the radio button Share with individual users/groups.
- Click on Select Users or Select Groups to display the list of all the users/groups shared in your account.
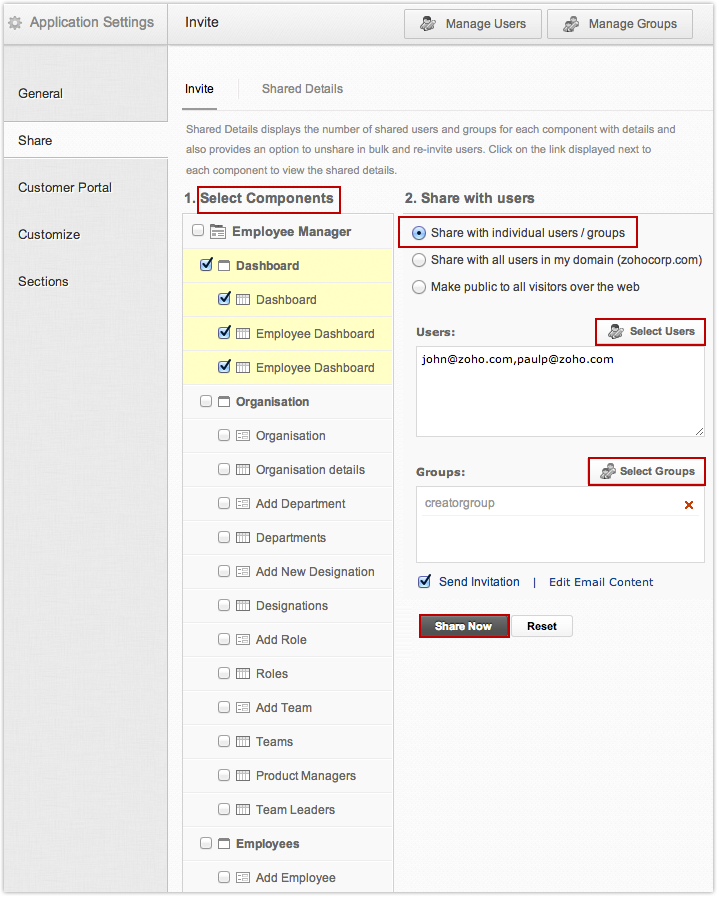
- The users/user groups in your account will be listed as shown in the screen-shot given below. You can select specific users/user groups in the list or use the Select All check box to select all users in the list. Click on Add button, to add the selected users to the share dialog.
List of Users

List of User Groups
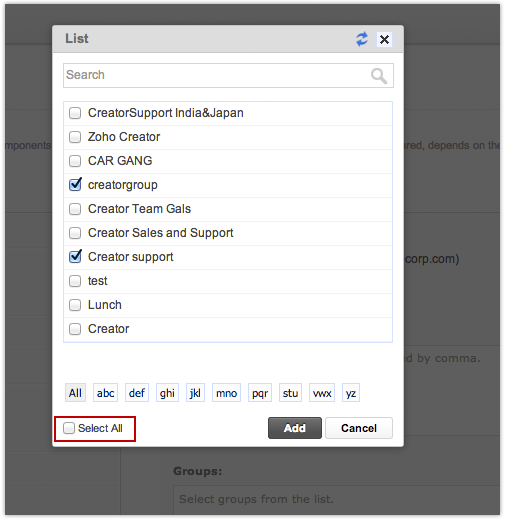
- The email ids of the selected users/user groups will be listed in the Users text area as comma separated values. The Send Invitation check box will be selected by default. This will send an invitation email to the shared user with a link to access the application. You can edit the default email content by selecting the Edit email content link displayed next to the Send Invitation check box.
- Click on the Share Now button, to share the selected component with the users. The shared user details will be displayed in the Shared Details tab.
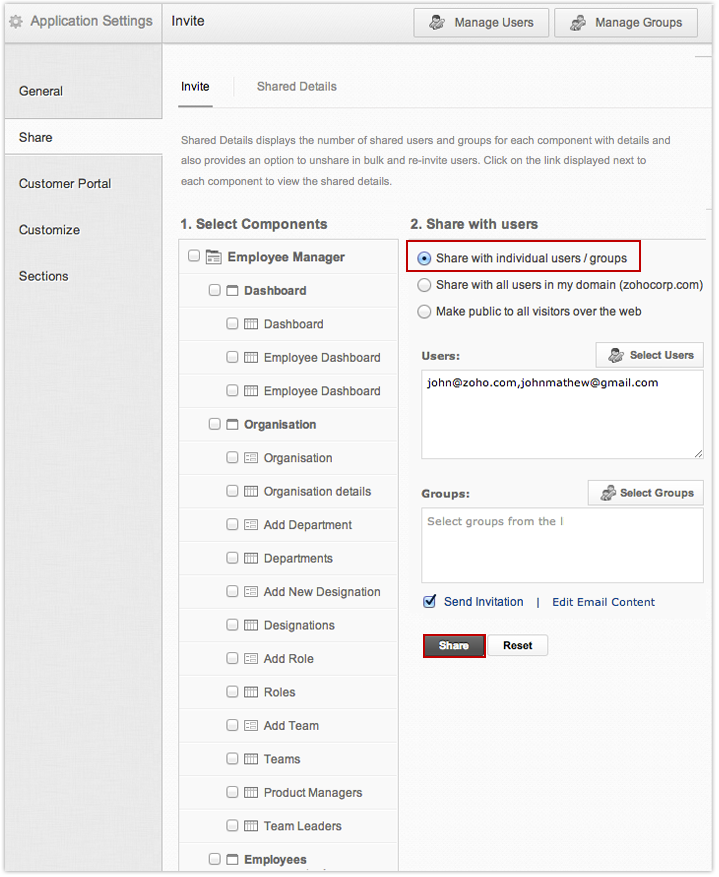
Share with all users in your domain (Domain Sharing)
This feature will enable the administrator to share his application with all users in his domain, with a single click.
Note
- This feature has been deprecated for new accounts created after April 2014. We are currently working on migrating the old accounts to new ones. Please contact support@zohocreator.com for any clarifications.
To share with all domain users,
- Select the required component from the Components Tree on the left-side of the Share -> Invite page. Refer Levels of Sharing for more information.
- Select the radio button Share with all users in my domain and click on Done. All user accounts whose email address ends with the admin domain name (the domain name used by the Zoho admin account), will be able to access the shared components in your application. For example, if the admin email id is "xxx@zoho.com", then all email ids ending with zoho.com will be able to access.
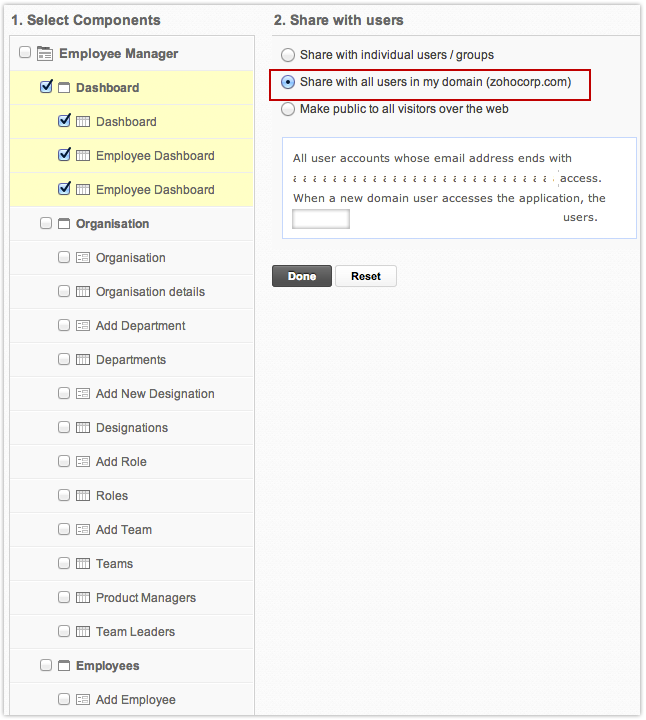
- When a domain user accesses the shared link he will be added to the Manage users list with active / inactive status, based on the pricing plan. If inactive, a message will be displayed informing the user to contact the application owner.
Make Public to all visitors over the web
The administrator can enable public access to the Forms, Reports and Pages in the application. To enable public access, refer the topic Publish Form, Reports and Pages.
Note
- This feature has been deprecated for new accounts created after April 2014. We are currently working on migrating the old accounts to new ones. Please contact support@zohocreator.com for any clarifications.
Access a shared application
To access the shared application,
- Sign into Zoho Creator using your Zoho ID.
- If you do not have a Zoho ID, create one using the email ID to which the application was shared to.
- Once you log in into Zoho Creator, the Zoho Creator home page is displayed.
- From the left pane, click on the “Shared Applications” link.
- The applications that are shared to you will be listed.
- Click on the name of the application to access it.
- You can also access the shared applications directly by clicking on the link that was sent to you via email by the owner of the application.
Shared Details
The Shared Details tab displays the count of shared users and groups for each component with details and also provides option to unshare in bulk and re-invite users.
View Shared Details
- The Shared Details tab will display the number of users and groups shared to each component.
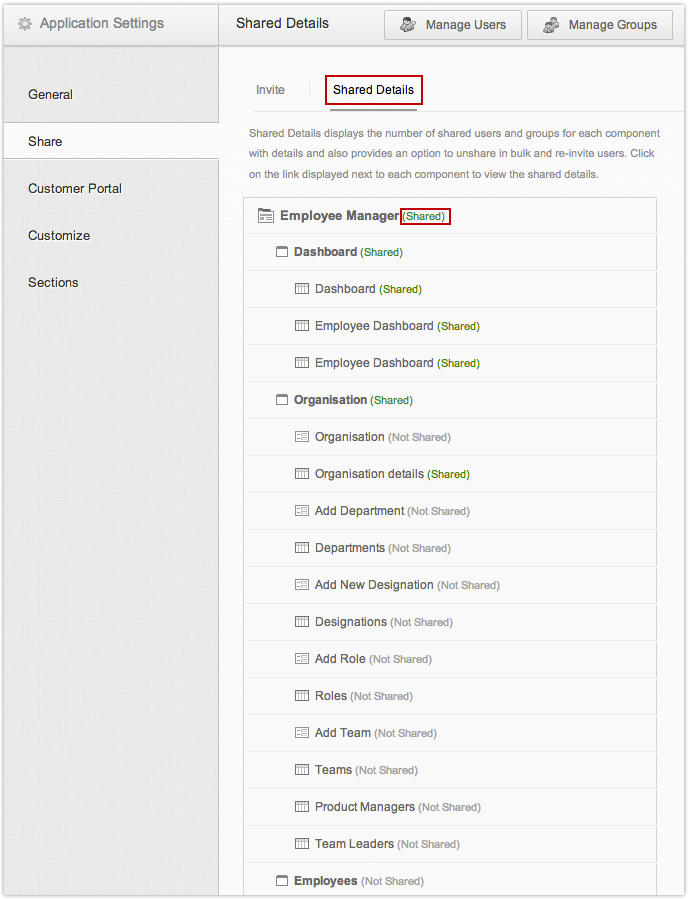
- You can click on the link displayed near each component to view the list of users, groups and domain users shared details.
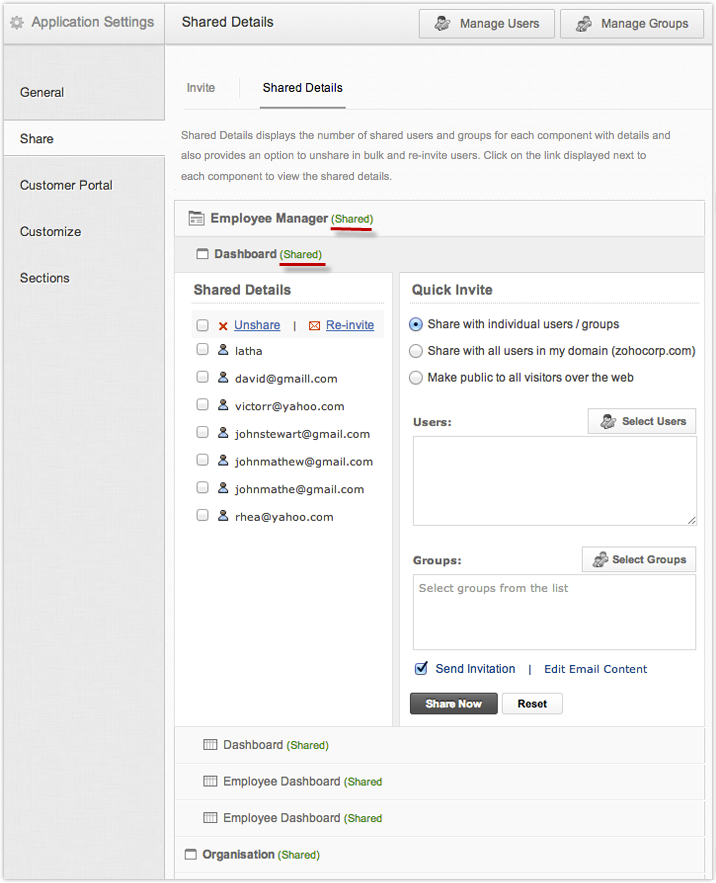
Unshare in Bulk, Reinvite and Quick Invite
- Unshare users in bulk or unshare selected users by selecting the Unshare link. The unshared users will be removed from the Shared details list and will not be able to access the shared component.
- Re-invite users in bulk or re-invite selected users by selecting the Re-invite link. The invitation email will be sent to the selected users.
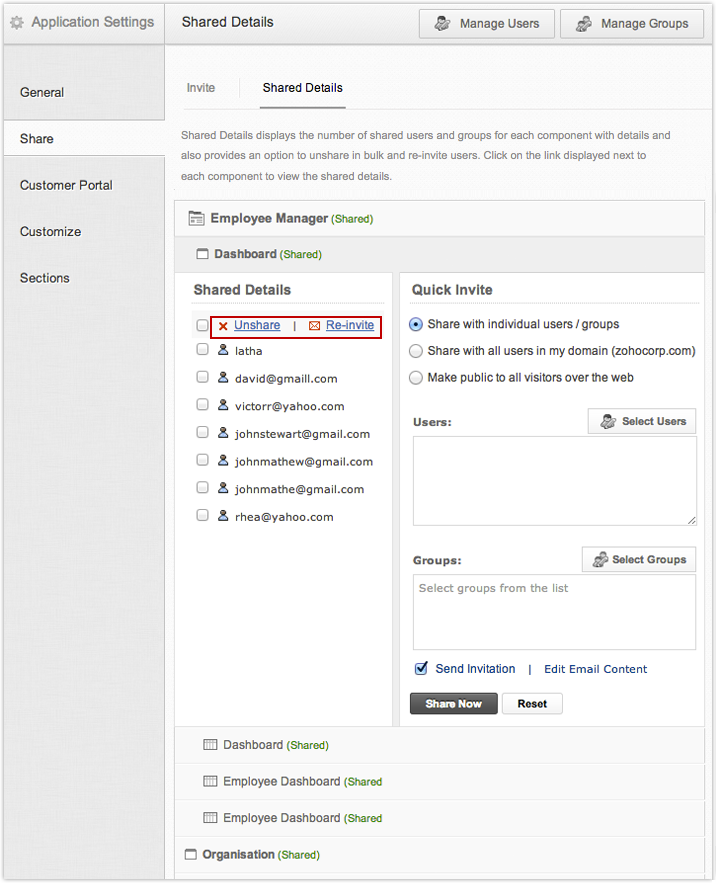
- Use the Quick Invite option to share users, groups and domains directly from your Shared Details.
Manage Users and Groups
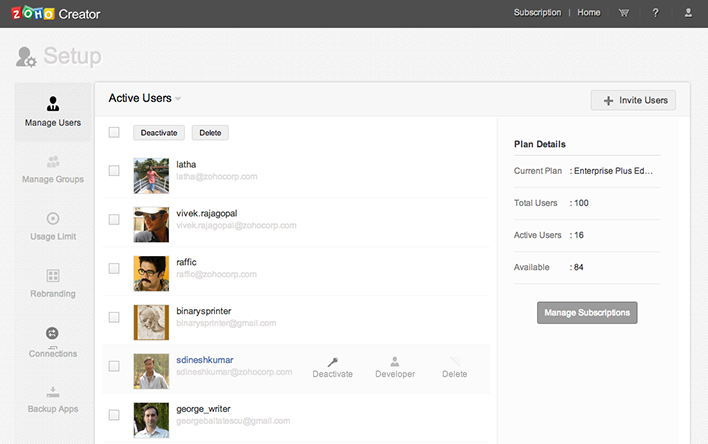
Manage Users
The administrator can add new users, delete existing users, activate or deactivate users and change roles from the Manage Users link displayed in the Share tab. By default, a user will be added with role as User. If you'd like to change the "Role" of an existing user to Developer or vice versa, click on the change link displayed next to the Role of a user.
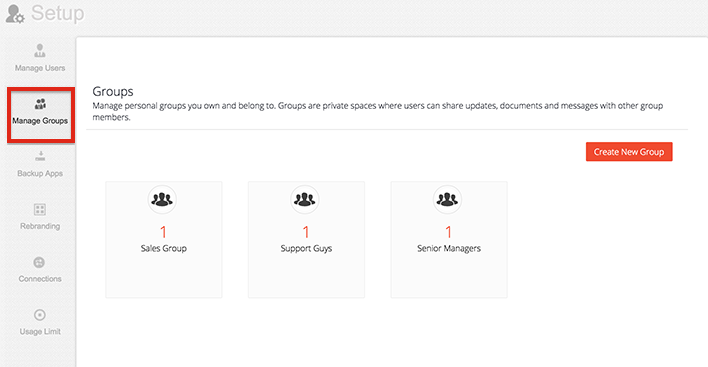
Manage Groups
The administrator can create manage personal groups from the Manage Users link displayed in the Share tab.
Levels of Sharing
Zoho Creator supports three levels of sharing an application with users. You can share the entire application (i.e) all forms/views in the application, or share a page (i.e) all the forms and views configured in a specific page/tab or only specific forms and views in the application.
Application Level Sharing
Sharing an entire application enables the shared users to access all the forms and views in the application. To share the entire application with users, select the Application name from the Component tree and share with users.
Page Level Sharing
You can organize the Forms and Views in your application under sections/pages and configure page level sharing. Refer the topic Customize Look and Feel to organize the layout of your application. To configure page level sharing, select the respective section/page from the Component tree and share with users. Shared users will be able to access all the forms and views in the page/section.
Form/View Level Sharing
Sharing specific Forms and Views in the application, enables the shared users to access only the specific Form/View. To configure form/view level sharing, select the respective form/view from the Component tree and share with users.
Edit Permission to Shared Users
To allow a shared user to edit the application, please refer the following link.


